
Start Wired Connection
Setup a printer.
Follow the steps below.
![]() Note
Note
- Notes on Wired Connection (Appears in a new window)
-
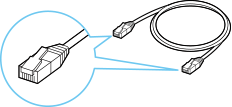
You will need an Ethernet cable (sold separately).
-
Remove the Cap (A) from the port located on the left side at the back of the printer.

-
Connect the printer and a network device (router, etc.) with an Ethernet cable (B).
Do not connect to any other port.

 Note
Note- Please wait for about 20 seconds until a wired LAN connection is detected.
-
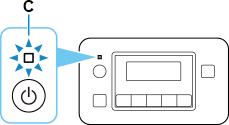
Make sure printer is turned on.
If the power is on, the ON lamp (C) will be lit or flashing.
 Important
- If printer is performing cleaning, print head alignment, or other processes, wait for the process to finish, before starting setup.
-
Check the screen displayed on the printer.
If None of the Following Screens is Displayed:


![Easy WL connect screen: [Easy WL connect] is completed](screens/trl-s087.png)

-
Restart printer.
Press the ON button to turn off the power, and then turn it back on.
Important- If a USB cable is connected to the printer, disconnect it.
-
Proceed with the setup as follows according to your environment.
If One of the Following Screens is Displayed:
-
If the following screen is not displayed, press the OK button (D) once or twice to display the screen.

-
Press the Setup button (E).

-
Use the
 or
or  button (F) to select Printer settings, then press the OK button.
-
Select LAN settings and press the OK button.
-
Select Wired LAN and press the OK button.
-
Select Enab./dis. wired LAN and press the OK button.
-
Select Enable and press the OK button.
-
If the screen on the below appears, press the OK button.
If the following screen is not displayed, proceed to the next step.

-
Press the Setup button.

The network connection setup is now complete.
When connection is complete,
 appears on screen.
 -
Proceed with the setup as follows according to your environment.
